Wondering how to clean a laptop keyboard after crumbs, dust or fingerprints have built up? The safest method is gentler than pulling off keycaps or spraying cleaner between the keys. Start with a powered-off laptop, remove loose debris with a suitable soft tool or carefully directed air, and wipe only the outer key surfaces with an almost-dry microfiber cloth.
Before cleaning: turn it off and prepare the tools
Shut down the laptop fully, unplug the charger and disconnect accessories. If the battery is designed to be removed by the owner, follow the manufacturer’s instructions; do not open a sealed laptop merely to remove its battery. Let the device cool before you start. Dell’s computer-maintenance guidance also warns against cleaning a device while it is powered or connected.
Useful supplies include a clean, soft, lint-free microfiber cloth; a small soft brush; and, only where the manufacturer recommends it, a can of electronics-compatible compressed air. Keep food, loose drink containers, paper towels, sharp picks and household spray bottles away from the keyboard while cleaning.
How to clean a laptop keyboard step by step
1. Remove loose crumbs without forcing the hinges
With the lid open and the machine safely off, tilt the laptop slightly so loose crumbs can fall away. Do not shake it aggressively, strike it against a desk or flip a heavy laptop upside down while holding only its display. Use a very soft brush to lift visible dust from the spaces between keys.
2. Use compressed air only as directed for your model
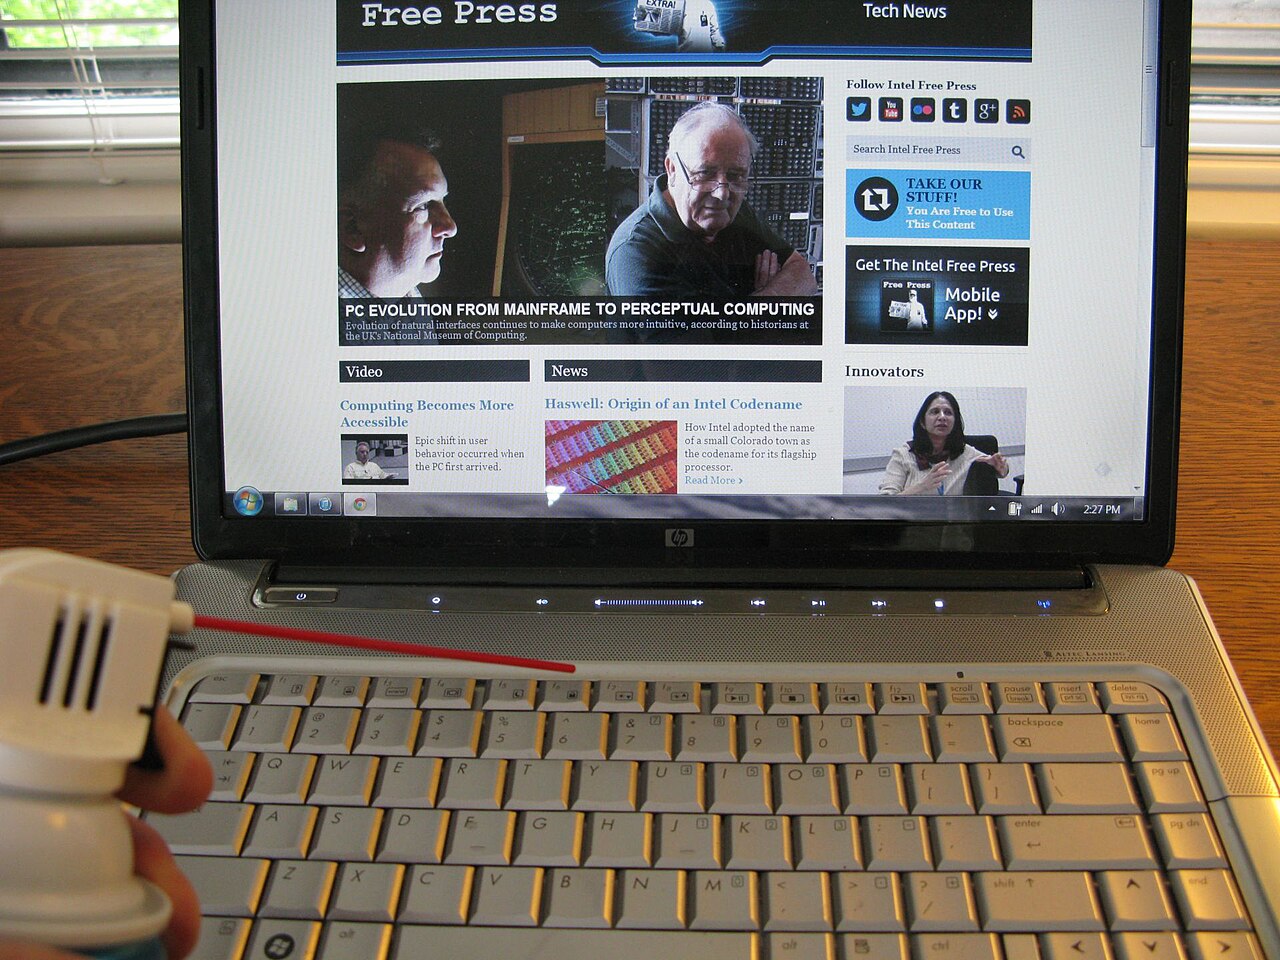
For laptops whose manufacturer permits it, use short controlled air bursts across the keyboard rather than directing prolonged pressure straight into one key opening. Keep the can upright so propellant does not spray onto electronics. Do not insert the straw between keys or use an industrial air compressor.
Apple has a particularly specific procedure for supported MacBook keyboards: tilt the computer to about 75 degrees, spray from left to right, then repeat after rotating to each side. Follow Apple’s keyboard-cleaning instructions for eligible MacBook models instead of treating that angle as a universal Windows-laptop rule.
3. Wipe the tops of the keys
Run a dry microfiber cloth gently across the keyboard and palm rest. For stubborn surface oils, refer to the exact laptop manufacturer’s cleaning guide before selecting a cleaning fluid. If it allows a lightly dampened cloth, put the approved amount of liquid on the cloth, never directly on the keyboard, and keep it away from the gaps, speaker holes and power button.
Different finishes and keyboards tolerate different substances. Some manufacturers permit carefully applied 70% isopropyl-alcohol solutions on particular surfaces; that does not mean every laptop coating or keyboard is safe to wipe with alcohol. When unsure, use a dry cloth and consult the device instructions.
4. Allow the laptop to dry before reconnecting power
If you used any approved moisture, the key surfaces should be fully dry before you plug the charger back in or switch the machine on. If liquid seeped under the keys rather than staying on their surfaces, stop and assess the situation as a spill, not routine cleaning.
What to do with sticky or unresponsive keys
A sticky key may have visible residue near an edge, but it may also be a worn or damaged switch. Carefully clean the exposed perimeter without inserting a sharp object. Never pry a laptop keycap off as a default step: thin scissor mechanisms and retention clips can break, and many laptop keycaps are not intended for casual removal.
If the keyboard still fails, test whether the problem occurs only in one application. A key that produces repeated characters or an unexpected shortcut may involve software settings rather than dirt. If you meant the Windows accessibility feature, see AVARIXO’s separate Sticky Keys guide; it will not repair a physically stuck key.
For an external removable-keycap gaming keyboard, a different maintenance method may apply; our mechanical keyboard cleaning guide covers that hardware. Avoid applying those keycap-removal steps to a thin laptop keyboard.
Spilled coffee or water? Stop cleaning and protect the laptop
If a drink has entered the keyboard, shut down the laptop immediately if safe, disconnect power and accessories, and do not test whether it still types. Blot visible liquid gently from the outside without pushing moisture further inside. A serious spill, especially one containing sugar or milk, warrants professional assessment because residues can remain after surface drying.
Do not use a hairdryer, high heat, rice or repeated power-on attempts as a substitute for inspecting internal damage. Internal batteries and electronic components require appropriate service precautions.
FAQ
Can I use a vacuum cleaner on my laptop keyboard?
Do not assume a powerful household vacuum is suitable: strong suction and static are concerns for delicate electronics. Follow the manufacturer’s specified soft-brush or compressed-air method instead.
Is it safe to spray alcohol directly on laptop keys?
No. Never spray liquid directly onto a laptop keyboard. If the manufacturer permits a cleaning solution, apply it sparingly to a lint-free cloth and keep moisture away from gaps.
Should I remove laptop keys to clean underneath them?
Not for routine cleaning. Laptop keycap clips are often fragile. Consult the service documentation for your exact model or a qualified technician before attempting removal.
How often should I clean a laptop keyboard?
Wipe away visible grime when it appears and give the keys a gentle dry clean periodically. Shared or high-use devices may need more frequent surface cleaning, but repeated wet cleaning can be counterproductive.