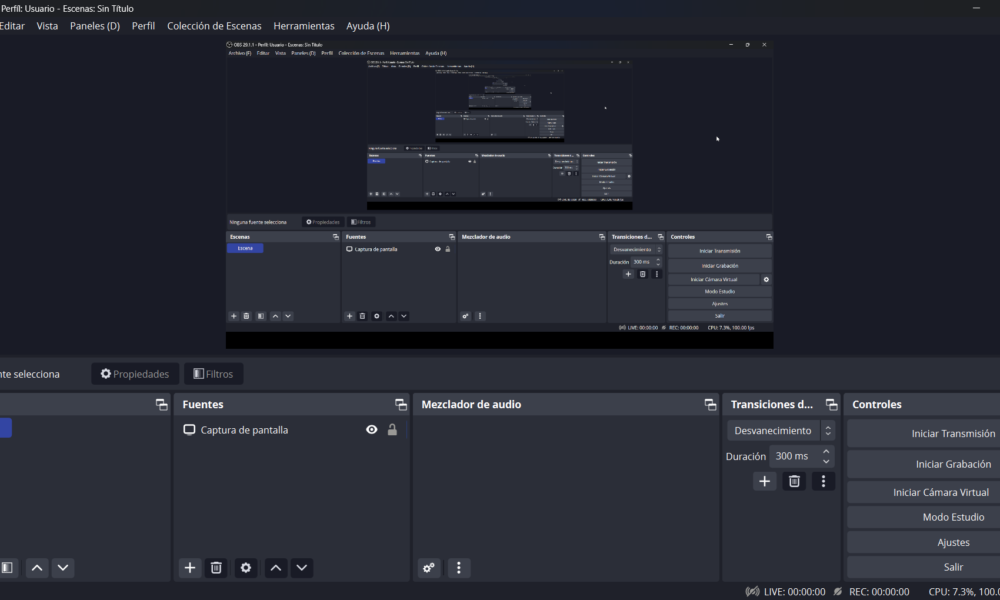

OBS Studio can record your screen for free on Windows, macOS, and Linux. Install OBS from the official OBS website, create a scene, add a screen or window source, confirm the audio meters are moving, and select Start Recording. When you finish, select Stop Recording and open the folder shown under Settings > Output > Recording Path.
The part that trips up first-time users is choosing the right capture source. Recording the entire desktop is different from recording one app or a game, and macOS uses a different source from Windows. Below is a practical setup that avoids blank video, missing audio, accidental private notifications, and incompatible output files.
OBS screen recorder: the 7-step quick setup
- Get OBS Studio from its official site. Avoid third-party download buttons and extensions that claim to be required for recording.
- Run the Auto-Configuration Wizard. When OBS opens for the first time, let it choose reasonable initial settings for your computer. To run it again, open Tools > Auto-Configuration Wizard and choose recording as the priority.
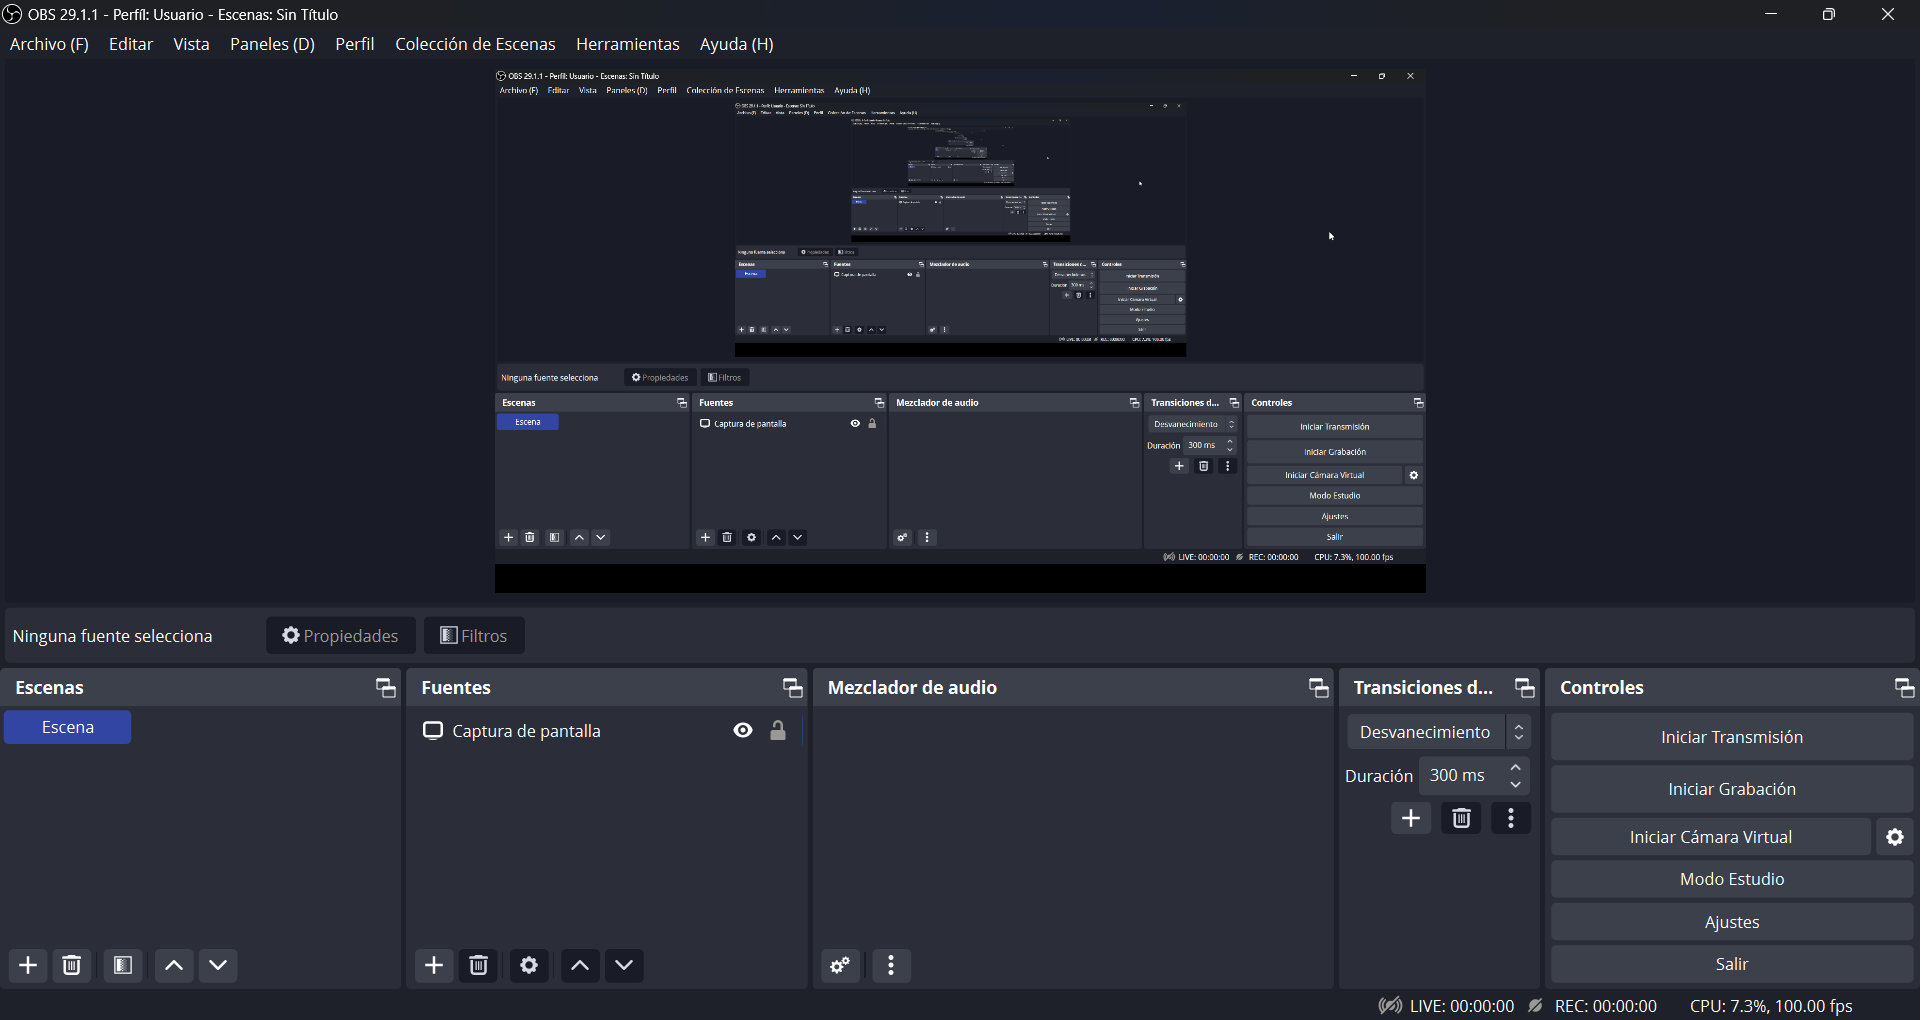
- Create a scene. In the Scenes dock, select the plus button and call it something useful such as Screen Recording.
- Add a visual source. In the Sources dock, select plus and choose Display Capture for your whole Windows screen, Window Capture for a specific window, or the appropriate macOS Screen Capture source on a Mac.
- Check your microphone and computer sound. Speak and play a brief system sound while watching the Audio Mixer meters. If a meter never moves, check which device or capture source it represents.
- Make a ten-second test recording. Select Start Recording, do the action you intend to capture, then select Stop Recording.
- Open and watch the file. Confirm that both the picture and intended audio are present before recording a full lesson, game, or meeting.
These steps follow the structure of the official OBS Quick Start Guide. The interface can vary slightly across operating systems and newer OBS releases.
Which OBS capture source should you choose?
| What you want to record | Source to try | Important note |
|---|---|---|
| Everything on a Windows monitor | Display Capture | Can include desktop notifications and other windows |
| Only one desktop application | Window Capture | Choose the correct running app window |
| Windows PC game | Game Capture | Designed for supported games; compatibility varies |
| Entire Mac screen or Mac application | macOS Screen Capture | macOS screen-recording permission is required |
| Webcam beside screen capture | Video Capture Device | Position and resize it in the scene preview |
| USB capture card | Video Capture Device | The hardware must be compatible and connected |
If OBS displays a black rectangle after you add a window, start by selecting the correct source and verifying that the app is still open. A window hidden, minimized, or presented using a capture-incompatible rendering method may not show up as expected. Test a different capture method before reinstalling OBS.
How to record your screen with OBS on Windows 11 or Windows 10
Record the entire desktop
With a scene selected, click Sources > + > Display Capture, select the monitor if you have more than one, and confirm. You should now see the monitor in the OBS preview. If the image is too large or appears cropped, right-click the source in the preview and use the available transform options to fit it to the canvas.
Close personal tabs, sensitive documents, message pop-ups and password managers before recording. Display Capture can expose whatever appears on that display while the recording runs.
Record only a program window
Use Window Capture and choose the program from the list. This is often better for tutorials because you can switch your own desktop tasks without making every screen change part of the video. Recheck the preview after opening dialogs: not every pop-up belongs to the window capture you selected.
Record gameplay
Try Game Capture for a supported Windows PC game. If the capture is black or missing, test Window Capture or Display Capture to isolate whether the problem is game-specific. The correct option depends on the game, graphics hardware and rendering method.
If you just need Windows’ built-in tools, see our Windows 11 screen recording comparison: Snipping Tool vs. Xbox Game Bar before adding a full OBS workflow.
How to record a Mac screen with OBS Studio
On recent versions of macOS, add a macOS Screen Capture source and select whether to capture a display, application or window. You may be asked to allow recording of the screen in macOS privacy settings. OBS also lists the permissions it needs under its Review App Permissions menu. Grant only the permissions necessary for your intended capture.
According to OBS’s macOS Screen Capture Source guide, the modern source is based on ScreenCaptureKit. On supported macOS 13+ configurations, the source can capture application or desktop audio as well. OBS’s separate macOS audio guide explains version-specific options. Do not assume a Windows Desktop Audio setting will work identically on every Mac.
After granting macOS permissions, recreate or reselect the capture source if the old preview remains blank. Test both the screen and audio before a long recording.
How to record microphone and computer audio in OBS
The Audio Mixer is your first diagnostic tool. Each active source has a moving level meter when audio reaches it. If you see video but hear nothing in playback, identify which signal is missing before changing all your settings.
- Speak into the microphone. If the microphone meter stays still, open Settings > Audio and select the intended input device, or add an appropriate Audio Input Capture source.
- Play audio from an application. Verify that a suitable desktop/application audio source moves. On macOS, follow OBS’s separate capture-source guidance.
- Make a short local recording and listen through speakers or headphones. Meters moving does not guarantee the right audio track was selected in advanced recording settings.
- If you hear an echo, check whether the same device is being captured twice or monitored back through the same output. OBS explicitly warns about duplicate device capture in its Audio Sources guide.
For a voice lesson or product demo, aim for intelligible speech without clipping or distortion. If game audio overwhelms your voice, lower the game/audio source level rather than endlessly increasing microphone gain.
Best starter recording settings for OBS
There is no single perfect recording preset. Hardware, storage space, resolution and your final use all matter. Start with the Auto-Configuration Wizard and review these decisions only if the test file looks or sounds wrong.
| Setting | Practical starter guidance |
|---|---|
| Base canvas resolution | Match the display or source you want to capture when possible |
| Output resolution | 1080p is a useful target if the computer records it smoothly; otherwise test lower output |
| Frame rate | 30 fps is often sufficient for demonstrations; try 60 fps for fast gameplay if hardware permits |
| Recording path | Pick a folder with plenty of free storage that is easy to find |
| Recording format | OBS recommends MKV for resilience if recording stops unexpectedly |
| Encoder | Consider a supported hardware encoder if available, then test quality and file size |
Why MKV? OBS’s Standard Recording Output Guide recommends the format to reduce the chance of losing an entire recording if the application or computer stops unexpectedly. If your editor requires MP4, open File > Remux Recordings and convert the completed recording into a more widely supported container without re-recording your screen. Remuxing changes the container; it is not a magic fix for missing sound or corrupt content.
Where does OBS save screen recordings?
Go to Settings > Output and find Recording Path. That folder is the location used for locally saved recordings unless your configuration has been changed. You can also use the relevant OBS file-menu command to show the recordings folder if it is available in your version.
If you cannot find a file, confirm you clicked Stop Recording and that the recording had enough storage space to finish. Search the configured folder for the filename corresponding to the time the recording started. A screenshot saved by a different app will not necessarily be stored in the OBS recordings folder.
OBS screen recorder not working? Six useful fixes
The screen is black
Choose the correct capture source for your operating system, check that the selected monitor or window still exists, and verify privacy or app-access permissions. Windows games may work better with Game Capture than Window Capture; macOS may require Screen Recording access.
The video has no microphone sound
Confirm the microphone isn’t muted, the correct input device is selected, and the corresponding meter moves in the Audio Mixer. Test with a short sample. If you use advanced multi-track recording, inspect the selected track assignments.
Computer audio is missing
Check that you are capturing the right output or application and that it isn’t muted. On newer macOS systems, use the documented macOS audio capture source rather than copying a Windows tutorial.
The recording is choppy
Lower output resolution or frame rate, close unnecessarily demanding background programs, and rerun the Auto-Configuration Wizard. Watch for overloaded encoding indications during the test. High-resolution capture is not useful if the finished video drops many frames.
The recording will not open in my editor
Check the file extension. If the file is MKV and your editor expects MP4, use OBS’s built-in remuxing option first. Do not delete the original MKV until you have checked the converted file.
The wrong window or private content was recorded
Switch from Display Capture to a supported Window Capture source, close sensitive windows, and disable unnecessary notifications. Always inspect the preview before starting the next recording.
OBS Studio vs. the built-in Windows recorder
OBS is better when you need layered sources, a webcam overlay, independent audio controls, a custom recording format or a repeatable capture scene. Built-in Windows screen recording can be simpler for a quick one-window clip. Neither tool guarantees that every game or protected video stream can be recorded, and neither removes the need to obtain permission before recording private meetings or copyrighted content.
Frequently asked questions about OBS screen recording
Is OBS screen recorder free?
Yes. OBS Studio is free, open-source software for video recording and live streaming. Download it from obsproject.com.
Can OBS record only one window?
Yes. Use an appropriate Window Capture source or macOS Screen Capture in window/application mode. Compatibility depends on the operating system and the application being captured.
Can OBS record audio and screen together?
Yes. OBS can combine captured picture sources with microphone and system/application audio sources when properly configured.
Is OBS available for Mac and Linux?
Yes, and the official OBS download page provides supported platforms. The available screen and audio capture sources differ among systems.
Should I record OBS footage as MKV or MP4?
OBS recommends MKV to protect recordings against abrupt interruptions. You can use File > Remux Recordings to produce an MP4 container when required by an editor.
Why does OBS show black video while audio still works?
The visual source may be wrong, blocked, minimized or missing permission even though the audio input remains active. Diagnose the capture source separately from the audio mixer.
Bottom line
The easiest OBS screen recorder setup is one scene, one correctly chosen visual source, verified audio meters and a ten-second test clip. Once that works, adjust quality, overlays and advanced audio settings gradually. For up-to-date controls and troubleshooting, check the official OBS Quick Start Guide and recording output documentation.

Other Articles