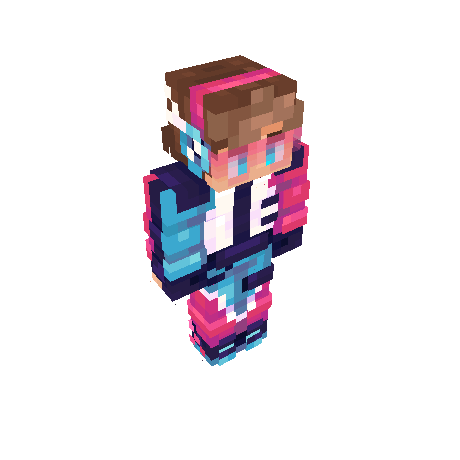

A Minecraft skin editor lets you design a custom player appearance, usually by painting a 64×64-pixel texture and saving it as a PNG file. For Java Edition, you can upload that PNG through the Minecraft Launcher or the official account skin controls. For Bedrock Edition, skin import and the Dressing Room depend on the platform: some devices allow importing a compatible custom PNG, while others rely on the built-in Character Creator or Marketplace.
The most important choice is not which editor has the flashiest preview. It is whether the editor exports a valid Minecraft skin layout, lets you select the correct arm model, and does not demand your Microsoft account password. This guide explains how to create, preview, export and apply a skin without confusing Java and Bedrock.
What is a Minecraft skin editor?
A skin editor is a pixel-art tool that displays the flat texture of a Minecraft character and often provides a rotatable 3D preview. You paint individual pixels on the head, body, arms and legs, then export the result. Unlike a texture pack, a skin changes your character’s appearance rather than the blocks and items around you.
Some editors run in your browser, others are installed desktop tools, and Minecraft Bedrock includes a separate Character Creator for supported customization. You do not need to install a gameplay mod to use a standard skin in Java Edition.
Which Minecraft skin editor should you choose?
| Option | Best for | Check before using |
|---|---|---|
| Browser-based pixel editor | Painting a classic or slim 64×64 skin and previewing it in 3D | Can it export a valid PNG without an account login? |
| Desktop pixel-art application | Editing individual texture pixels and keeping local backups | Does it preserve transparency and the skin’s exact pixel dimensions? |
| Minecraft Bedrock Dressing Room / Character Creator | Combining supported in-game character options | Available items, import options and compatibility vary by platform |
| Existing-skin editor or remix tool | Starting with a skin you have permission to adapt | Check the original creator’s reuse rules before publishing your version |
You can explore browser-based editors such as the MinecraftSkins skin editor, but treat any third-party website as a separate service: read its privacy and upload policies, check the domain carefully and avoid account-login prompts that imitate Microsoft’s sign-in page. AVARIXO has no affiliation with that editor.
How to make a Minecraft skin step by step
1. Start with the correct skin template
Choose a standard 64×64 skin layout for modern Minecraft versions. The texture is not one picture of a person: it is a collection of unfolded surfaces for the head, torso, arms and legs. A 3D preview makes the relationship between the flat image and character model easier to understand.

2. Pick the classic or slim arm model
Minecraft Java supports two common player models: classic (wider arms) and slim (narrower arms). Choose the matching preview model in your editor and the same model when applying the skin. A mismatch can make arm textures look awkward or leave pixels where you did not expect them.
3. Block in the main colors first
Start with the silhouette: hair, face, shirt, pants and shoes. Use a small, coordinated palette rather than filling every area with unrelated colors. Make the front and back recognizable at the game’s normal camera distance. Then rotate the preview to check the sides and the underside of the arms.
4. Add shading without blurring the pixels
Place darker pixels under hair, around clothing seams and on the undersides of limbs. A subtle highlight on the front of a jacket or on the hairline can add depth. Avoid automatic photo-resizing filters: they often produce noisy colors that look muddy at Minecraft’s small texture scale.
5. Use the outer layer for optional details
The second texture layer can create the appearance of hats, jackets, cuffs or hair strands that sit over the base model. Preview the skin with the outer layer both enabled and disabled. If you put essential features only on an outer layer, your character may look incomplete when that layer is hidden.
6. Export a PNG and keep the editable original
Export the skin as a PNG, not a JPG. JPEG compression can change individual pixels and remove transparency. Keep a copy of the original file with a meaningful name such as blue-hoodie-slim-64x64.png. Before uploading, confirm the image dimensions and check that it is a skin texture, not a screenshot of the 3D preview.
How to use your custom skin in Minecraft Java Edition
- Open the official Minecraft Launcher and select Minecraft: Java Edition.
- Find the Skins section and choose the option to add or create a skin entry. The wording may vary with launcher updates.
- Choose the classic or slim model to match the skin you designed.
- Browse to the exported PNG, give the skin a recognizable name and save it.
- Select the new skin for your profile, launch the game and check it in third-person view.
If you use an older launcher layout, consult the official Minecraft website or Minecraft Help Center for current account and launcher guidance. A skin editor is not a substitute for the official game launcher.
Already have a skin and only need to apply it? Our guide to changing a Minecraft skin in Java and Bedrock focuses on that task rather than creating a design.
Can you import a skin into Minecraft Bedrock Edition?
Sometimes, depending on the device and platform. On supported Bedrock devices, open the Dressing Room, find the classic-skin customization or import option, and select a compatible PNG. The exact controls differ by version. Some console environments do not offer the same local custom-skin import options available on other platforms.
The Bedrock Character Creator also offers an alternative way to personalize your character with supported in-game items. Do not assume that a Java skin editor’s export can be installed on every Bedrock platform, or that a purchased Bedrock character item can be converted into a Java PNG.
Minecraft skin editor mistakes and how to fix them
| Problem | Likely cause | What to try |
|---|---|---|
| Skin looks stretched or broken | Wrong template or classic/slim model mismatch | Export a standard layout and select the matching arm type |
| Upload is rejected | Wrong file type, dimensions or corrupted PNG | Export again as a valid skin PNG and verify the image size |
| Skin appears flat or unfinished | Only front surfaces were painted | Rotate the 3D preview and fill all relevant sides |
| Hair or jacket disappears | Outer skin layer is hidden | Enable the appropriate skin customization layers |
| Character still shows an old skin | Wrong profile, stale session or skin not selected | Verify the active account, save the skin and restart the game |
| Bedrock has no import button | Platform or version does not support that workflow | Use the available Dressing Room / Character Creator options |
Five ideas for a custom Minecraft skin
Minimalist adventurer: A neutral jacket, contrasting boots and a distinctive scarf that stays readable from far away.
Seasonal explorer: A winter coat or autumn palette, with subtle outer-layer cuffs and a matching hood.
Retro pixel hero: Strong blocks of color, a simple face and high-contrast gloves inspired by classic pixel-art readability.
Builder outfit: Workwear-style overalls and a tool-belt effect painted on the torso without overcrowding the texture.
Fantasy traveler: A cloak-like outer layer, boots and carefully shaded shoulder details, keeping the base model recognizable.
If you are also designing a home or server spawn to match your character’s aesthetic, see our Minecraft build ideas for survival projects.
How to choose a safe Minecraft skin editor
- Use a well-known project page and double-check the domain before uploading anything.
- Prefer editors that let you export the skin PNG directly.
- Never enter your Microsoft password into a third-party skin editor; authenticate only through official account flows when necessary.
- Do not run an unrelated executable to download what should be an image file.
- Check reuse permissions before copying or publishing another creator’s skin.
- Save your original file locally so you can switch editors without losing work.
Frequently asked questions
What size should a Minecraft skin be?
For a standard modern player skin, 64×64 pixels is the usual texture layout. Legacy 64×32 skins exist, but the 64×64 layout provides the additional layer and model flexibility most editors expect.
Can I make a Minecraft skin without downloading software?
Yes. A browser-based skin editor can paint, preview and export a PNG without installing a desktop app. Check the site’s terms and security before uploading a design.
Can I turn a photo into a Minecraft skin?
You can use a photo as color or outfit inspiration, but a direct photo-to-skin conversion often needs substantial manual cleanup because the final texture has very few pixels and must match a specific UV layout.
Why does my skin look different in-game?
Common reasons include a classic/slim arm mismatch, missing side textures, disabled outer layers or a different selected profile. Compare the exported PNG with the editor’s 3D preview first.
Are custom Minecraft skins free?
Creating a basic skin with a free editor and importing it through a supported Java workflow does not normally require buying a separate skin. Third-party editor features and Bedrock Marketplace items may have their own pricing.
Does a skin editor work for both Java and Bedrock?
The exported PNG may be useful on both editions where custom imports are supported, but the upload workflow and available customization features are different. Check the exact platform before you start.
Bottom line: Choose a 64×64 skin editor with a 3D preview, design for the correct classic or slim model, export a PNG and apply it through the official Java Launcher or supported Bedrock controls. The best skin is one you can recognize from every angle—not one with the most effects in the editor.

Other Articles

Roblox Studio Mobile: Can You Use It on iPhone, iPad or Android?
Minecraft Education: How to Download, Sign In and Start Learning