To make a hanging indent in Google Docs on a computer, select the paragraphs, choose Format > Align & indent > Indentation options, change Special indent to Hanging, set the distance you need, and click Apply. A hanging indent keeps the first line of each selected paragraph in its normal position while moving the remaining lines inward. Google’s official desktop instructions, checked October 12, 2026, confirm this method.
Hanging indents are especially useful for a bibliography or Works Cited page: the author’s name remains easy to scan at the start of each entry, even when the citation wraps onto multiple lines. You can apply the formatting to one citation, a selected group of citations, or a paragraph in a longer report.
How to do a hanging indent in Google Docs in 6 steps
- Open the Google Doc in a desktop browser, such as Chrome, Edge or Safari.
- Highlight the citation or paragraphs you want to format. To apply the change to several references at once, select all the relevant reference entries, not the entire essay.
- Open the Format menu.
- Choose Align & indent, then Indentation options.
- Open the Special indent menu and choose Hanging. Enter your required measurement in the field next to it if needed.
- Click Apply. Check a citation with at least two lines to confirm the first line stays at the normal position and later lines move inward.
You do not need to press Tab repeatedly on every wrapped line. Google Docs uses paragraph formatting, which means the indentation remains attached to the paragraph if your words reflow.
Source: Google Docs Editors Help — Add a hanging indent.
What does a hanging indent look like?
Imagine one bibliography entry wraps onto three lines. Without a hanging indent, all three lines begin in the same position. With a hanging indent, the first line begins farther left and lines two and three begin farther right, creating a recognizable ledge. The formatting applies to an entire paragraph; manually inserting spaces is not a reliable substitute.
| Format | First line | Following lines | Typical use |
|---|---|---|---|
| Normal paragraph | At the paragraph’s left indent | At the same position | General body text |
| First-line indent | Moved farther right | At the normal paragraph position | Some essay paragraph styles |
| Hanging indent | At the normal first-line position | Moved farther right | Reference lists and bibliographies |
| Page margin | Not a paragraph-specific control | Changes the page’s usable width | Printing and page layout |
If the text only occupies one line, the difference may be invisible until the citation wraps. Try viewing a longer entry to verify the format.
How big should the hanging indent be?
Many academic citation formats use a 0.5-inch hanging indent for reference entries. However, follow the specific style guide or instructions for your assignment; Google Docs lets you enter a different measurement. In a document showing centimeters, half an inch is 1.27 cm.
For APA references, MLA Works Cited entries and many other bibliographies, the important principle is consistent paragraph formatting across all entries. Formatting is only one component of a correct citation. Check the required author order, punctuation, capitalization and other citation details separately.
Can you make a hanging indent with the ruler?
Google Docs also shows paragraph indent markers above the page when the ruler is visible. Choose View > Show ruler if necessary. These markers change paragraph positioning, while the outer edge of the page controls the printable content width.
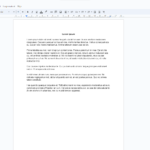
The ruler can be useful for visual adjustments, but small markers are easy to drag incorrectly. For a predictable hanging indent in a school assignment, use Format > Align & indent > Indentation options rather than relying on an approximate drag. The featured image illustrates a Google Docs editor with paragraph markers in the ruler; it is an archival interface example, not a claim that the exact 2026 menu looks identical.
Fix hanging indents that do not work
The whole paragraph moved to the right
You probably changed the general left indent, not the Special indent setting. Select the affected paragraph again and choose Hanging under Indentation options. Review the result on a two-line entry.
Only the first citation changed
Select all entries you want formatted before applying the command. If your citations have separate paragraph breaks, ensure the selection covers every intended entry. Avoid applying it to the bibliography heading.
The formatting disappears when you type
Keep each citation as one paragraph. If you insert a manual line break or start a new paragraph in the middle of a citation, the formatting may behave differently. Add line breaks only where your required citation format actually calls for them, and reselect the correct paragraph if necessary.
Tabs or spaces create uneven lines
Remove manual spacing used to fake a hanging indent. Select the entry, reset any unwanted indent if necessary, and apply the proper paragraph setting. This allows Google Docs to handle wrapping as you edit the text.
The paragraph is pushed outside the page
Review both the left indent and Special indent values. If the page has narrow margins or the document uses a wider font, the usable content width may be smaller than you expect. Adjust the paragraph setting, not unrelated page margins, unless the assignment requires a different overall layout.
I can’t find Indentation options on my phone
The Google Docs mobile interface is not identical to the desktop browser. Google’s documented hanging-indent steps refer to a computer. If you cannot find the Special indent control on iOS or Android, open the document on a computer to apply the formatting rather than trying to imitate it with repeated spaces or manual tabs.
Hanging indents vs. bibliography layout in Google Docs
A polished reference page usually needs several independent settings: a heading, correctly ordered citations, consistent line spacing, hanging indents, and sometimes a particular page margin. Do not change the page margin just to make a citation appear indented. Likewise, do not use a first-line indent when you need a hanging indent: they move different lines.
If your document is long, AVARIXO’s Google Docs table of contents guide explains how headings and navigation work. You can also read our Google Docs and Drive offline guide before working without internet, or see Google Docs dark mode options for more comfortable on-screen editing.
Frequently asked questions
How do I do a 0.5-inch hanging indent in Google Docs?
Select the reference paragraphs, open Format > Align & indent > Indentation options, choose Hanging as the Special indent, enter 0.5 inches (or the corresponding measurement shown by your interface), and apply the change.
Is there a keyboard shortcut for a hanging indent?
Google’s documented and reliable method is through Indentation options. Keyboard shortcuts can differ by browser and system, so a generic shortcut copied from another text editor may not set a true Google Docs hanging indent. Use the menu when precision matters.
Can I apply hanging indents to multiple citations at once?
Yes. Select all the citation paragraphs you want to format, then apply the Hanging special indent to the selection. Inspect the first and last entries to confirm the change covered the entire selection.
How is a hanging indent different from a first-line indent?
A first-line indent moves the first line farther right than the lines below it. A hanging indent leaves the first line farther left and moves subsequent lines inward. Bibliographies usually require the latter.
Should I use a hanging indent for APA or MLA references?
Both APA-style reference lists and MLA-style Works Cited pages commonly call for hanging indentation. Check the edition of the style guide you are required to follow for the exact measurement and citation format.
Sources and featured-image attribution
- Google Docs Editors Help: Add a hanging indent — verified October 12, 2026.
- Google Docs Editors Help: Change how paragraphs and fonts look — verified October 12, 2026.
- Featured screenshot by Gaskeke, Wikimedia Commons, CC BY-SA 4.0, unmodified. The screenshot shows an older Spanish-language Google Docs editor and ruler markers; use the steps above for the current interface.

Other Articles