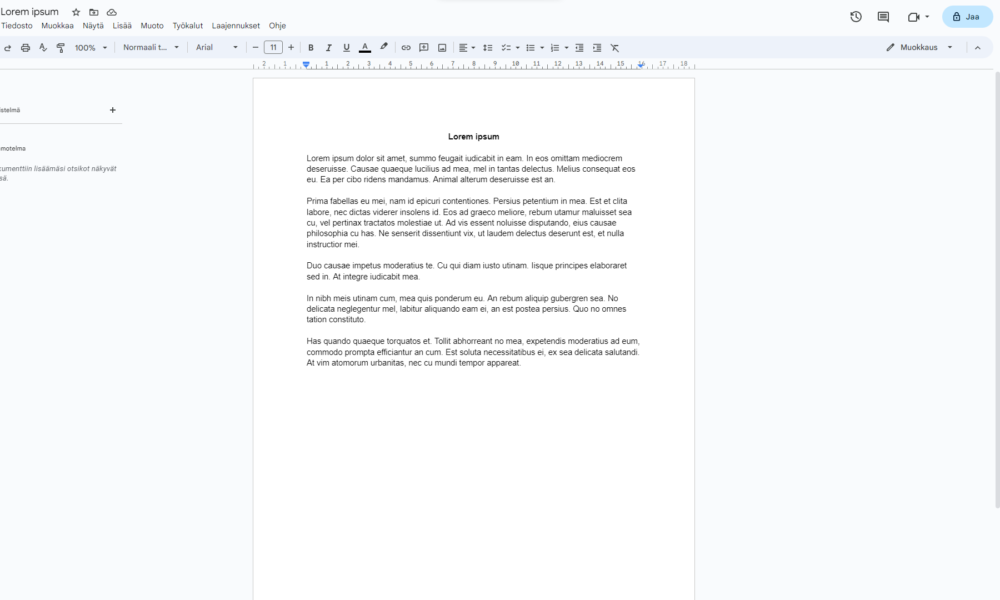

To change margins in Google Docs on a computer, open your document, choose File > Page setup, select Pages, enter your preferred top, bottom, left, and right margin measurements, and click OK. If the margin controls are missing, your document may be in Pageless mode; switch it to Pages first. These steps follow Google’s official documentation, checked October 12, 2026.
Margins are the empty space between a document’s content and the edges of its page. Setting them correctly can improve the readability of a report, fit a school assignment’s requirements, or prepare a document for printing. The key is knowing when to use Page setup, when a ruler adjustment is enough, and when you are changing a paragraph indent rather than the page margin.
How to change all four margins in Google Docs
This is the most reliable method for a document you will print or export as a paginated PDF. It works in a desktop web browser on Windows, macOS, and Chromebooks.
- Open your document in Google Docs.
- From the top menu, select File > Page setup.
- At the top of the dialog, choose Pages if it is not already selected.
- Find the Margins fields. Enter values for Top, Bottom, Left, and Right, using the units displayed in your interface.
- Select OK and review the document. Text, tables, and images may reflow as the usable page width changes.
Google also provides a Set as default option when you want the new page setup used for future documents, rather than only for the current file. Changing the default does not necessarily rewrite your existing documents.
Official source: Google Docs Editors Help — Change page settings on Google Docs.
What margin size should you use?
Start with the required format for your assignment, employer, publication, or print job. If there is no specified size, one-inch margins on all sides are a familiar, readable starting point for US Letter documents, but they are not a universal rule.
| Document type | Practical starting point | What to check |
|---|---|---|
| School essay or report | 1 inch on each side if permitted | Instructor or style-guide rules take priority. |
| Business memo | About 1 inch on each side | Letterhead, logo, and print requirements. |
| Document with wide tables | Adjust horizontal margins cautiously | Tables should remain readable when exported or printed. |
| Bound or stapled document | Consider additional binding-side space | Paper size, binder requirements, and printer limits. |
Use the same measurement units shown by Google Docs rather than assuming the dialog always displays inches. A margin of 0.5 inch is approximately 1.27 cm; the precise requirements for your task matter more than this example.
Change margins with the ruler
The ruler gives you visual control over the document’s text area and certain paragraph settings. To display it, select View > Show ruler if that option is available in your interface.
- Make sure the document is in Pages mode.
- Show the ruler if it is hidden.
- Look at the horizontal ruler above the document. The gray area marks the margin region, while the white area represents the writable page width.
- Adjust the relevant margin boundary carefully, then inspect multiple paragraphs to check the result.
Important: The blue paragraph indent markers and the page’s outer margin boundaries do different jobs. Dragging a first-line indent marker can make a paragraph look narrower without changing the actual page margins. For exact measurements across the document, use File > Page setup instead.
Google’s guide on page breaks and margins explains how the ruler and section settings interact.
Why can’t I change the margins in Google Docs?
1. The document is in Pageless mode
Pageless is designed for a continuously scrolling canvas rather than fixed paper dimensions. Google explicitly says page margins and several other page setup features do not apply in that format. Go to File > Page setup > Pages, confirm the switch, and then return to the margin fields.
2. You changed an indent instead of a margin
Paragraph indents control where lines begin within the content area. A hanging indent, for example, pushes subsequent lines inward but leaves the first line aligned differently. That is not the same as changing the left margin of the whole page. If you’re formatting a bibliography, Google provides a dedicated setting at Format > Align & indent > Indentation options.
3. You are using a phone or tablet
Available page-setup controls can differ between the Google Docs mobile apps and the desktop web editor. If you cannot find separate margin fields on a mobile device, open the document in the desktop web editor and use Page setup. Do not assume a tutorial for one device applies to every platform.
4. Text looks cut off after the change
Try a wider content area, check the paper size, and inspect any large tables or images. A document can look fine on screen but produce awkward line breaks in the exported PDF. Download a test PDF or check print preview before relying on the new layout.
5. You cannot edit the document
Check whether you have edit access or whether the document is currently view-only. A viewer cannot make page-setting changes to the owner’s file. If appropriate, ask for access or create your own editable copy.
Margins vs. indents vs. page size
| Setting | Changes | Best used for |
|---|---|---|
| Page margins | Blank space around the page’s main content | Print layout and assignment requirements |
| Left/right paragraph indent | Where selected paragraph text starts or ends within the margins | Quotes and nested text |
| First-line or hanging indent | Relative position of the first line versus following lines | Bibliographies and paragraph styles |
| Paper size | Total page dimensions, such as Letter versus A4 | Printing and page-count control |
| Pageless mode | Removes fixed page boundaries in the editor | Screen-first documents and wide content |
If your real goal is to organize a long document rather than change its print layout, AVARIXO also has a guide to adding a Google Docs table of contents. For a more comfortable editing appearance, see Google Docs dark mode options. If you’re preparing to work without a connection, read our Google Drive offline files guide.
Frequently asked questions
How do I set 1-inch margins in Google Docs?
Open File > Page setup > Pages, then enter 1 for the top, bottom, left, and right margins if the interface uses inches. If it displays centimeters, use the corresponding measurement your assignment requires (1 inch equals 2.54 cm).
Can I have different margins on different pages?
Google Docs supports section-based formatting in Pages mode, but the available controls can depend on the document’s section breaks. Check the section you want to modify in Page setup rather than assuming a change will automatically affect only one page. For tightly controlled mixed layouts, examine the exported PDF before submitting or printing.
What is the default margin in Google Docs?
One inch on each side is a common default in standard Pages documents, but the current document’s settings, templates, and any changes you previously saved can differ. Open Page setup to see the actual values rather than assuming a default.
Why don’t I see a Margins option?
First verify that the document is set to Pages, not Pageless. Then open File > Page setup on a computer. If you are in the mobile app or do not have edit permission, some controls may be unavailable.
Does changing margins affect the text itself?
It changes how much horizontal and vertical space is available to place the text. Sentences are not rewritten, but the line breaks, page breaks, and total number of pages may change. Recheck headings, tables, and any images afterward.
Sources and image credit
- Google Docs Editors Help: Change page settings — checked October 12, 2026.
- Google Docs Editors Help: Add page breaks and move margins — checked October 12, 2026.
- Google Docs Editors Help: Indentation options — checked October 12, 2026.
- Featured screenshot: Syx1 / Wikimedia Commons, CC BY-SA 4.0, unmodified. It is an illustrative Google Docs editor screenshot from 2023 with visible page and rulers; menu language and layout may differ today.

Other Articles

How to Do a Hanging Indent in Google Docs: Steps and Fixes
