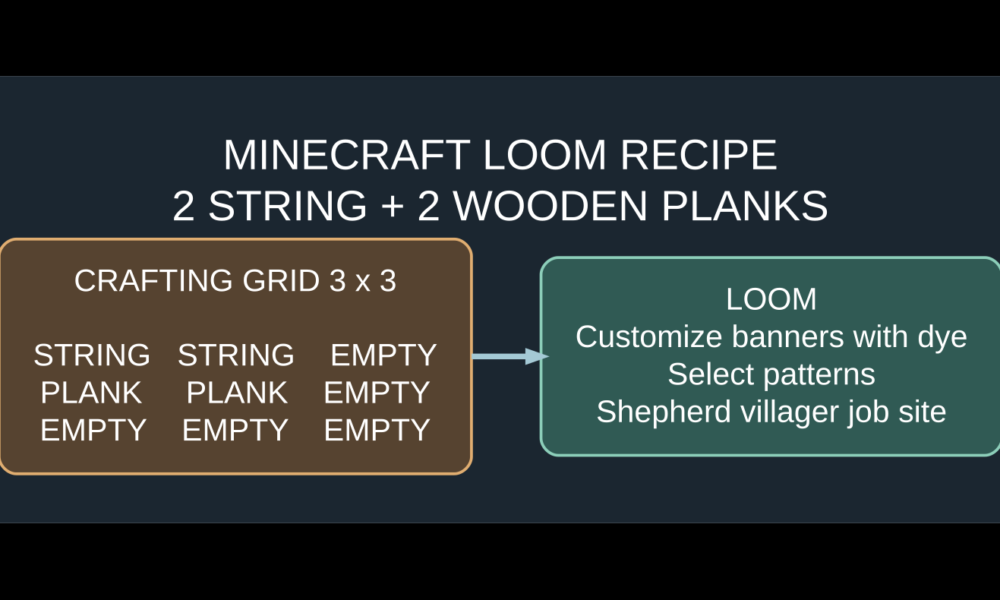

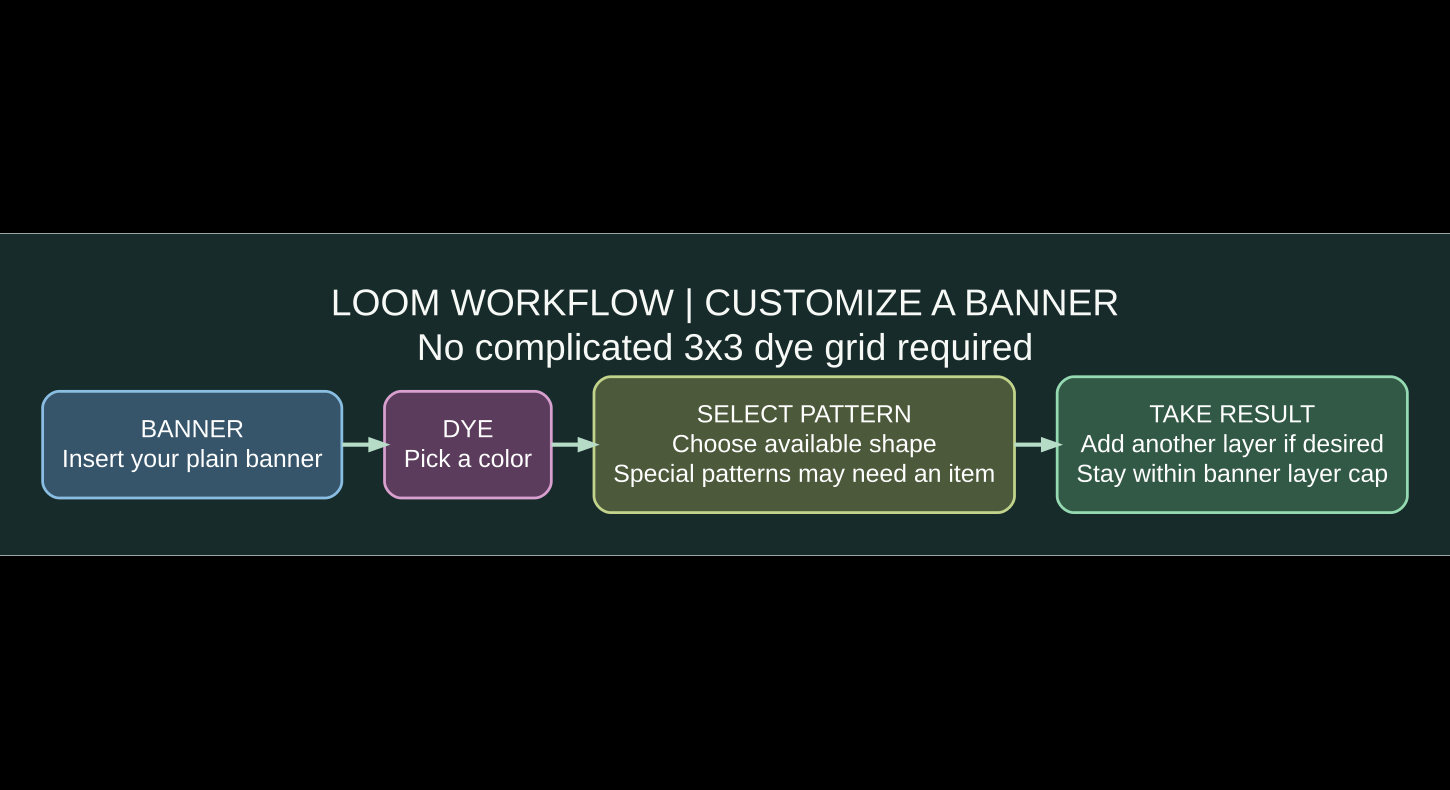
To make a loom in Minecraft, combine two string and two wooden planks in a 2×2 square: put two string side by side on top, and place a plank directly under each string. Use the loom to customize banners without arranging dyes across an entire crafting table. Insert a banner and one dye, choose a pattern, and take the result. You can return the banner to the loom to add more layers of colored designs, up to the normal six-pattern limit.
Some decorative banner designs need a special Banner Pattern item in the loom’s optional third slot. That detail matters in newer Minecraft editions: for example, Minecraft Java Edition 1.21.2 made the Field Masoned and Bordure Indented designs require their own pattern items rather than appearing automatically in the ordinary selection list. This guide covers recipes, slots, layering, the pattern-item distinction, and why a particular banner style might not show.

Minecraft loom recipe: exact ingredients and grid
Gather two pieces of string and two planks from a compatible wooden material. String is commonly obtained from spiders, cobwebs, or other in-game sources; planks come from processed wood. You can craft the loom in the small 2×2 inventory grid or use a crafting table, because the pattern needs only four slots.
| Row | Left slot | Right slot |
|---|---|---|
| Top | String | String |
| Bottom | Wooden plank | Wooden plank |
Use any supported plank type; the recipe does not require one specific tree. Wool does not replace string in the loom crafting recipe. Nor is a loom crafted with sticks, shears, or a banner as ingredients. Mojang’s Block of the Week: Loom page confirms the two-string/two-plank recipe and explains how the game introduced the block in Village & Pillage.
How to use a loom to design a Minecraft banner
- Make or collect a banner. You need a base banner item before the loom can add visual patterns to it.
- Place the loom on the ground and interact with it to open its menu.
- Put the banner in the banner slot. The loom is not a banner-crafting replacement; you start with an existing banner.
- Insert one dye in the color slot. A preview list of patterns becomes available.
- Pick a pattern. Choose a stripe, cross, gradient, border or another supported design.
- Take the output banner. The result contains the new design layered over the base banner.
- Repeat with a different dye or pattern until the banner looks right, without exceeding the supported maximum.
Think of the loom as a small design workshop. It consumes dye when you add a pattern; a special reusable Banner Pattern item, when required, acts more like a template that unlocks a particular design. The pattern item generally is not consumed simply by selecting its design, but check your version and modified-server rules.
Loom slots explained: banner, dye and optional pattern item
| Slot | What goes inside | What it changes |
|---|---|---|
| Banner | Existing banner, plain or already patterned | Provides the base fabric and any earlier design layers. |
| Dye | One supported dye item | Sets the color for the next pattern layer. |
| Banner Pattern | Optional matching pattern item | Unlocks certain special patterns that are not in the default options. |
| Output | Finished banner | Contains all preserved earlier layers plus the selected new design. |
For standard geometric patterns, the banner and dye alone usually give you plenty of options. Special pattern designs use a third-slot template. If you have both the banner and dye but an expected pattern is absent, the missing item may be a required Banner Pattern item, not a crafting-table bug.
How many designs can one banner have?
Under normal Minecraft survival mechanics, a banner holds up to six design layers on top of its base color. The order of application is important: a later layer can cover part of the earlier image. Start with a large background or border, then add detail and a final motif. You cannot simply undo one middle layer in the loom without working from an earlier copy or starting over.
For an easy beginner banner, choose a contrasting base banner, add a stripe in a lighter dye, then a centered shape in a third color. For a flag-like banner, stack one or two bold stripes first and finish with a symbol. Test designs with inexpensive dyes before spending rare pattern materials; you can often conserve materials by deciding on a sequence in advance.
Special banner patterns changed in Minecraft 1.21.2
Not every pattern shown in older Minecraft tutorials is still available automatically. Mojang’s official Java Edition 1.21.2 release notes added two itemized Banner Patterns: Field Masoned, crafted with paper and bricks, and Bordure Indented, crafted with paper and vines. Their corresponding designs no longer appear in the loom without the relevant item.
The same update also improved the names and textures of Banner Pattern items, so players can more easily tell different templates apart. A guide written for an older version might say to select a brickwork design directly from a basic loom menu; in a newer Java version you may need to obtain and insert the pattern item first. The difference is a versioned game mechanic, not something you solve by adding more dye.
Suggested Minecraft banner designs for a survival base
| Design idea | Easy color approach | Where to use it |
|---|---|---|
| Village flag | Simple base with one vertical stripe and contrasting center motif | Outside a starter village or meeting hall |
| Mining banner | Dark base with a bright stripe or triangle | Mine entrance or storage section |
| Clan banner | Two-tone diagonals with a bold border | Multiplayer headquarters |
| Garden marker | Green base with lighter geometric pattern | Fields or tree farm |
| Wayfinding sign | Bright base with a simple high-contrast design | Paths, outposts and roads |
These are design suggestions, not downloadable ready-made patterns or claims that a particular rare template is required. They work as inspiration for experimenting with common geometric shapes. A banner with too many overlapping layers can become hard to read from a distance, so keep your main symbol bold.
How to make or obtain a banner for the loom
A standard banner is made from six wool blocks of one color and one stick arranged with wool filling the top two rows and the stick centered on the bottom row of a crafting table. Once you have the banner, use the loom for its visual customizations rather than trying to place dye directly around the banner in the old crafting grid.
Wool color determines the base, but you can add pattern layers using other dyes. If you are gathering decorative resources, our Minecraft wool colors and building guide provides related ideas for matching colors in a themed base.
Why won’t my loom apply a banner pattern?
| Problem | Likely cause | Solution |
|---|---|---|
| Recipe does not craft a loom | Used wool, sticks or wrong placement | Place two string above two planks in a square. |
| No patterns show in the loom | Banner or dye is missing | Insert a banner and one valid dye into the correct slots. |
| A brickwork or indented border option disappeared | Newer Java editions require specific Banner Pattern items | Use the Field Masoned or Bordure Indented template item where applicable. |
| Cannot apply another layer | The banner reached its standard layer limit | Start a new banner or use fewer previous patterns. |
| Finished banner looks different | Layer order changes the final design | Apply broad layers first and small details later. |
| Villager will not become a shepherd | Ineligible villager or claimed/inaccessible workstation | Check profession status, previous trades and worksite access. |
Looms are also shepherd villager workstations
The loom is the job-site block of the shepherd villager. An eligible unemployed villager can claim an accessible loom and take the shepherd profession, opening wool- and color-related trading possibilities. A villager whose profession has been locked through trading may not freely switch to shepherd. The workstation works independently of whether you plan to use it for decorative banners.
For all the workstation blocks and their professions, consult our Minecraft villager professions and jobs guide.
Frequently asked questions about Minecraft looms
What do I need to craft a loom?
You need two string and two wooden planks. Put the string across the top of a 2×2 square and the planks directly below it.
Can I use a loom without a crafting table?
Yes, because the loom recipe fits in the player’s 2×2 crafting grid. You still need a banner and dye to use the completed loom for decoration.
How do you add a picture to a Minecraft banner?
Use the loom’s pattern menu to choose from available geometric designs, and put the corresponding special Banner Pattern item into the optional third slot if your desired motif requires one. This is not a general-purpose external-image upload feature.
How many dye items does the loom use per new pattern?
A standard new layer uses one dye of the chosen color. You can repeat the process to build up multiple layers, subject to the standard six-layer limit.
Where do looms generate naturally?
Looms can appear inside shepherd houses in villages, so you may find one without crafting it. Otherwise, two string and two planks are cheap early-game ingredients.
What if the brick pattern is missing?
In newer Java editions, the Field Masoned pattern requires its Banner Pattern item. The same applies to Bordure Indented, according to Mojang’s Java 1.21.2 notes.
Is the loom a trading workstation?
Yes. The shepherd villager profession uses a loom as its job-site block. This is separate from the loom’s banner-design interface.
Official Minecraft references and takeaway
The crafting recipe and banner workflow are described by Mojang in Block of the Week: Loom. The ordinary six-pattern cap and one-dye pattern economy appear in the official Village & Pillage snapshot notes, while Java 1.21.2 release notes explain the added banner template items. To make your first custom banner, craft a loom from two string and two planks, place a banner and dye inside, and try one clean pattern before experimenting with layered designs.