
Quick answer: To throw an American football, grip its laces with your fingers rather than burying the ball in your palm, turn sideways toward your target, step toward the receiver with the foot opposite your throwing hand, rotate your hips and shoulders, and release the ball from a comfortable overhand position with a smooth wrist-and-finger finish. Start with easy short throws: a tight spiral depends on the entire sequence, not just flicking your wrist as hard as possible.
This guide covers a beginner’s first pass, a more accurate spiral, left-handed adjustments, simple ways to throw farther without overstraining, and five progressive no-contact drills. It draws on the official NFL FLAG introduction to throwing a football. Younger players should use an appropriately sized football and a coach’s workload guidance. Stop if the shoulder or elbow hurts.
Step 1: Hold the Football With a Comfortable Lace Grip
The laces help your fingers locate the ball and create a repeatable hold. NFL FLAG notes that quarterbacks vary in how many fingers they place on the laces, so do not treat one photo as a compulsory exact grip for every hand.
- Hold the ball with the pointed ends running roughly forward and backward along your throwing hand.
- Let the finger pads of your throwing hand contact the surface across or near the laces. Many players find two, three or four fingers near the laces comfortable.
- Place the thumb underneath and opposite the fingers to support the ball.
- Leave a small, natural space under the palm instead of pressing the entire palm flat against the leather.
- Grip firmly enough for control, but not so tightly that the wrist and forearm stiffen. You should be able to adjust your hand without pain.
Small hands? Try a properly sized youth ball and slightly different lace-finger spacing. The best beginner grip is the one that produces control and repeatable release without forcing the hand into a strained position.
Step 2: Stand Sideways and Aim Before You Throw
For a right-handed passer, the left foot is the normal lead foot during a simple standing pass. Turn the body so the non-throwing shoulder faces the target, with knees relaxed and weight balanced. For a left-handed passer, reverse the sides. Avoid throwing from a rigid, squared-up stance using only the arm; that gives the larger muscles less opportunity to help.
Point the front step generally toward the receiver. A giant lunge is unnecessary, and a step that crosses far across the body can pull the throw off line. Practice a controlled, repeatable stride from a stable base before attempting a run-up or rolling throw.
Step 3: Start the Throw With the Body, Not Just the Arm
Bring the ball toward the throwing side near shoulder level with the non-throwing hand helping hold it until the motion begins. As you step with the lead foot, let the hips begin rotating and allow the shoulders and throwing arm to follow in sequence. The goal is a coordinated transfer of motion from legs through trunk to hand.
Keep the ball in a comfortable throwing path rather than forcing the elbow into an exaggerated height. For most beginners, an overhand motion is easier to learn and aim than a low sidearm throw. There are advanced variations in football, but an uncontrolled extreme arm angle is not the best starting point for a child.
Step 4: Release a Spiral Smoothly
A good spiral means the football rotates mostly around its long axis instead of wobbling side to side. As the throwing hand moves forward, the ball rolls off the fingers with a natural downward wrist follow-through. The final finger contact may vary slightly between players and throws; don’t attempt a painful last-instant twist just to imitate a slow-motion video.
A clean release, suitable ball size and balanced delivery matter more than throwing the ball at maximum speed. Work first with a partner who is close enough to catch an easy pass, then extend the distance gradually.
Step 5: Finish Across the Body
After the ball leaves the hand, let the arm continue forward and naturally across the body toward the opposite side. Your chest will generally rotate toward the intended target, and the back foot may move through as weight shifts. Do not abruptly stop the throwing arm at release—use a comfortable deceleration rather than a stiff block.
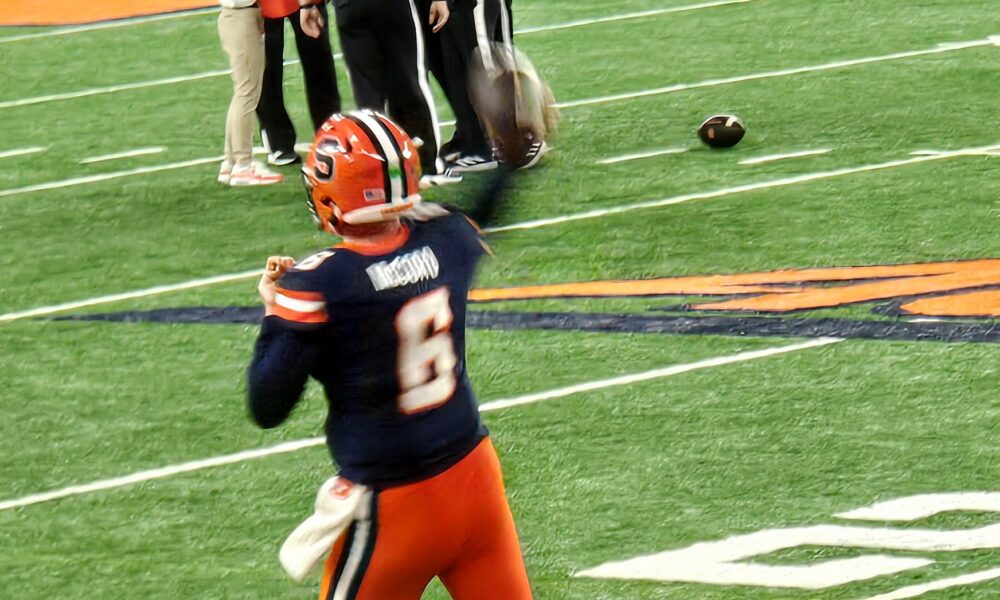
The featured photo shows college quarterback Kyle McCord preparing a pass during the 2024 Syracuse–Stanford game. It illustrates a real quarterback’s stance and ball carriage; the photo is not a sequence diagram or proof that every beginner should copy a professional player’s release angle.
The Throwing Checklist in One Table
| Part of the pass | Helpful cue | Common beginner mistake |
|---|---|---|
| Grip | Finger pads control ball near laces | Ball squeezed deep into palm |
| Setup | Sideways body with target in view | Feet planted randomly |
| Step | Lead foot moves toward receiver | Overstriding across body |
| Body rotation | Hips and shoulders help generate throw | Arm does all the work |
| Release | Smooth finger-and-wrist roll creates spiral | Hard forced wrist snap |
| Follow-through | Arm finishes naturally across body | Arm stops abruptly |
How to Throw a Football Farther Without Losing Accuracy
Distance comes from more than arm strength. Good alignment, lower-body drive, torso rotation, timing, a controlled release angle and the aerodynamics of a spinning ball all matter. Throwing harder with the arm alone may actually reduce accuracy and increase fatigue.
Build range gradually: Use a distance you can hit accurately. Move a few steps farther only after a series of comfortable, consistent passes. If the ball wobbles or falls short, return to the shorter distance, check grip and timing, and stop if the arm feels fatigued. More yards on one desperate throw are less useful than repeatedly getting a catchable ball to a receiver.
The deepest pass also differs mechanically from a flat short pass: a higher release trajectory can send the ball farther in the air, but too much loft produces a slow floating throw that a defender can intercept. Learn accuracy first and add distance with coaching.
Five Football Throwing Drills for Beginners
Drill 1: Laces and release — no throwing
Hold the ball with two or three finger arrangements near the laces. Regrip five times and gently simulate a throwing release while standing still, without actually firing the ball. Identify which comfortable grip provides the best fingertip control.
Drill 2: Short partner catch
Stand approximately five yards apart in open space. Throw easy chest-high passes using a short lead step and finish. Your partner returns the ball gently. Move apart only after both players are controlling the catch safely.
Drill 3: Step-and-point target
Place a safe target or a person in a marked catching zone. Without a pass defender, align your lead foot generally toward that area and deliver a comfortable throw. If the ball frequently sails wide, check whether the lead foot crosses the target line or the torso rotates too early.
Drill 4: Spiral consistency
Choose an easy, repeatable distance. Throw several controlled passes and note whether each ball rotates cleanly. After a wobble, check ball size, finger placement, release and body sequence instead of immediately trying to throw harder.
Drill 5: Two-target decision
Put a receiver or soft target to your left and right at safe short distances. Have a coach call one side. Turn your eyes and feet toward the chosen target, then throw with the same controlled motion. This connects basic mechanics to quarterback decision-making without requiring contact or a defensive rush.
Drill safety: These are coaching ideas, not a fixed medical throwing prescription. Keep the session age-appropriate, allow rest between repetitions and stop for pain. Do not throw directly toward someone who is not expecting the ball.
Why Your Football Wobbles Instead of Spiraling
Wobble can come from a ball too large for the player’s grip, inconsistent finger position, poorly timed release or a throwing path that sends the ball tumbling instead of spinning along its length. Start by reducing throw distance and speed so you can observe the basics.
If the spiral is clean at five yards but poor at fifteen, fatigue or an exaggerated change in release mechanics may be involved. Avoid trying to “fix” a wobble by snapping the wrist as violently as possible. Film a few throws from a safe side angle, then compare your own motion before and after a small correction.
Why Your Pass Misses Left or Right
For a right-hander, a ball consistently missing off to one side may reflect the front foot aiming away from the receiver, shoulders opening too early, a late or early release or inconsistent balance. These are possible causes, not a definitive diagnosis from one throw. Make only one change at a time and compare several controlled passes.
For left-handers: Reverse the lead-foot and throwing-side language. Trying to imitate right-handed arm movements without mirroring the stance can cause unnecessary twisting.
What Football Size Should You Practice With?
A full-size official ball can be difficult for smaller players to grip securely. Most youth leagues offer smaller football sizes with age-group guidelines, but the specific size and competition standards depend on the league. Use the designated ball for team play and a comfortable appropriately sized ball for introductory practice if permitted.
If a child must palm the ball tightly, cannot place their thumb comfortably beneath it or repeatedly loses control, a smaller football may help more than another complicated throwing cue.
Passing Form vs. Actual Football Game Rules
Practicing a throw is different from deciding whether a legal forward pass is available during a live game. In American football the rules govern when and where a forward pass can be attempted, who may receive it and what happens if the passer throws the ball away under pressure. Our NFL intentional grounding explainer covers one common rule. For the quarterback’s relationship to blockers, receivers and the defensive team, see football positions explained.
Six Throwing Mistakes to Correct First
- Throwing only with the arm: Add controlled footwork and natural body rotation.
- Using a ball too large for the hand: Choose the appropriate age-group size.
- Clenching the football: Use a firm but comfortable finger-controlled grip.
- Aiming a huge forward lunge: Step naturally toward the target without crossing your body.
- Stopping the arm at release: Allow a smooth follow-through.
- Trying deep throws while tired: Shorten distance or stop when mechanics deteriorate.
FAQ: How to Throw a Football
How many fingers should be on the football laces?
There is no one mandatory count. NFL FLAG explains that quarterback preferences vary from two to four fingers on or near the laces. Comfort and control are the deciding factors.
How do I throw a perfect spiral every time?
You cannot guarantee perfection on every attempt. A suitable grip, consistent release, steady body sequence and gradual practice improve the chances of a clean spiral.
Do you step with the same foot as your throwing hand?
For the basic standing pass, most right-handed throwers step forward with the left foot, and most left-handed throwers step with the right foot.
Can I learn without playing organized football?
Yes. Practice short, safe no-contact throws with a willing partner and an appropriately sized ball. Formal coaching can help you progress to longer and faster passes.
How do I throw farther?
Work on repeatable footwork, body rotation, timing and a stable release before adding throwing effort or distance. Stop when the arm becomes painful or fatigued.
Official Coaching Source and Photo Attribution
Instruction reference: NFL FLAG: How to Throw a Football. For general player positions and league rules, consult the respective official competition materials.
Featured original sports photograph: Kiran891 / Wikimedia Commons, CC BY-SA 4.0, resized for the website. Kyle McCord prepares a pass at the Syracuse–Stanford football game on September 20, 2024; no claim is made that the photograph demonstrates every technique in the guide.